Tag Archives: creative coding projects

P5.js Tutorial for Beginners

I had the immense pleasure of attending several creative coding workshops on April 4th. They were streamed live on the SpacyCloud Twitch channel. There were additional sessions involving Hydra, Raspberry Pi, Haskell, and more. However for this post I want to focus on the first session which was a P5.js tutorial. In this post I hope to translate the P5.js tutorial for beginners into a written format, for posterity and to share what I learned. I’m going to review what was taught in the live session. Hopefully SpacyCloud will have another live stream in the future so I can catch up on what I missed. Here is the landing page for the event schedule.

Although I have used Processing years ago when I was in college, I knew I was very rusty which is why I decided to tune into Leandra T’s P5.js tutorial stream. Originally branded as a creative coding language for artists, Processing is mainly used to create generative art, visualizations, and immersive installations. P5.js is basically a version of Processing that is ported to Javascript. Processing was developed my MIT and is built on top of Python. Naturally people wanted to be able to show their generative art online, so it didn’t take long for there to be a huge demand for Processing that worked with Javascript instead of Python. Since P5.js has taken off there is tons of code online that people are sharing, making it a lot easier to learn.

That being said, it’s still nice to have someone walk through every step with you. That is what Leandra did. After showing us an example of what we were going to make, Leandra dived right into the online P5 editor. Whats great about this editor is you can do all of your coding online and see the results of your code side by side. She went over some of the basic functions, such as setting the canvas and background, and drawing shapes.

In the above code (to be more precise, a screenshot from the aforementioned P5 editor) you can see two functions, setup and draw. The setup function is called once when the application first runs, while draw is called constantly every frame (at least 24 times per second). What that means is that while it looks like the circle is static, it’s actually being redrawn constantly. However our eye cannot perceive that so it looks as though the circle is always there.

As you might have guessed, createCanvas is only called once and the two numbers you pass are the pixel width and height of the canvas, respectively. The canvas defines the area within which you can draw. Inside the draw function, background is what defines the background color of your canvas. If you pass 1 number, you will get a shade of gray as if you passed 3 RGB (red, green, blue) values. That means that background(220) is just shorthand for background(220,220,220). Each value can be as high as 255 (white) or as low as 0 (black).

Then of course you have the ellipse. In the screenshot above there are only 3 values passed to the ellipse function: x coordinate, y coordinate, and radius. However, you can actually pass in 4 values, which is why the function is called ellipse rather than circle. Passing in 4 values means you can stretch or squish the shape because you are passing the x coordinate, y coordinate, width, and height.

So far this is pretty boring. Luckily, it only takes a few tweaks for things to get a lot more interesting. Instead of passing the ellipse static values you can pass in things like mouseX, mouseY, or random. Passing in mouseX to the first value of ellipse and mouseY to the second value will make it so that you are essentially painting circles across the canvas wherever you move your mouse, because the ellipse will follow your cursor. If you pass random instead, the computer will generate a random number every frame and draw the ellipse to those coordinates.

You need to at least pass random a maximum number, so that it knows the range within which the random number can fall. If you want circles to cover the whole canvas, you can use random(width) for the x coordinate and random(height) for the y coordinate because P5.js stores the width and height of the canvas to those variables. Also make sure you move background out of the draw function and into setup, otherwise you will only ever see 1 circle on the canvas because the background will continuously be drawn on top of it.

What the canvas will resemble when you pass in random(width) and random(height)
Using mouseX and mouseY will be more like “painting” with the shape

Okay so now we’ve got lots of shapes on the canvas, but where is the COLOR?! Much like you can provide the background 3 values that reflect red, green, and blue you can do the same for shapes with the fill function. For example, if I pass fill(255, 0, 0) I will get a completely red circle like below.

But what if I pass random values instead? What do you think will happen?

Now we’re cooking with gas. Leandra went through similar steps in her live tutorial, to make sure everyone understood the basic principles and the most commonly used functions in P5.js. One of the most popular uses is to create visualizations that respond to sound. These are obviously a huge thing at raves and concerts, and they are easy and fun to make. The first step is to make sure you have the sound library linked in your P5.js editor.

On line 5 in the above screenshot there is a url pointing to p5.sound.min which is the P5.js sound library. If you click the little arrow above the code it expands to view the files that you see on the left hand side. Click on index.html and confirm that you also have the p5.sound.min script on line 5.

The next screenshot illustrates the additional code you will need in order to setup the mic and start receiving data from it that you can use for your visualization. Basically, you have to setup some variables at the top so that you can access your mic anywhere in the code. The variables start off empty but then you pass the actual mic in your setup function and start it so that it actually runs. Finally, you need to get useful data from the mic so you call getLevel to get the loudness which you can use for visualizations. You can confirm that the mic is working by adding a console.log statement so you should see values being returned below your code when you run it.

I know that my mic is working because I am seeing values in my console at the bottom

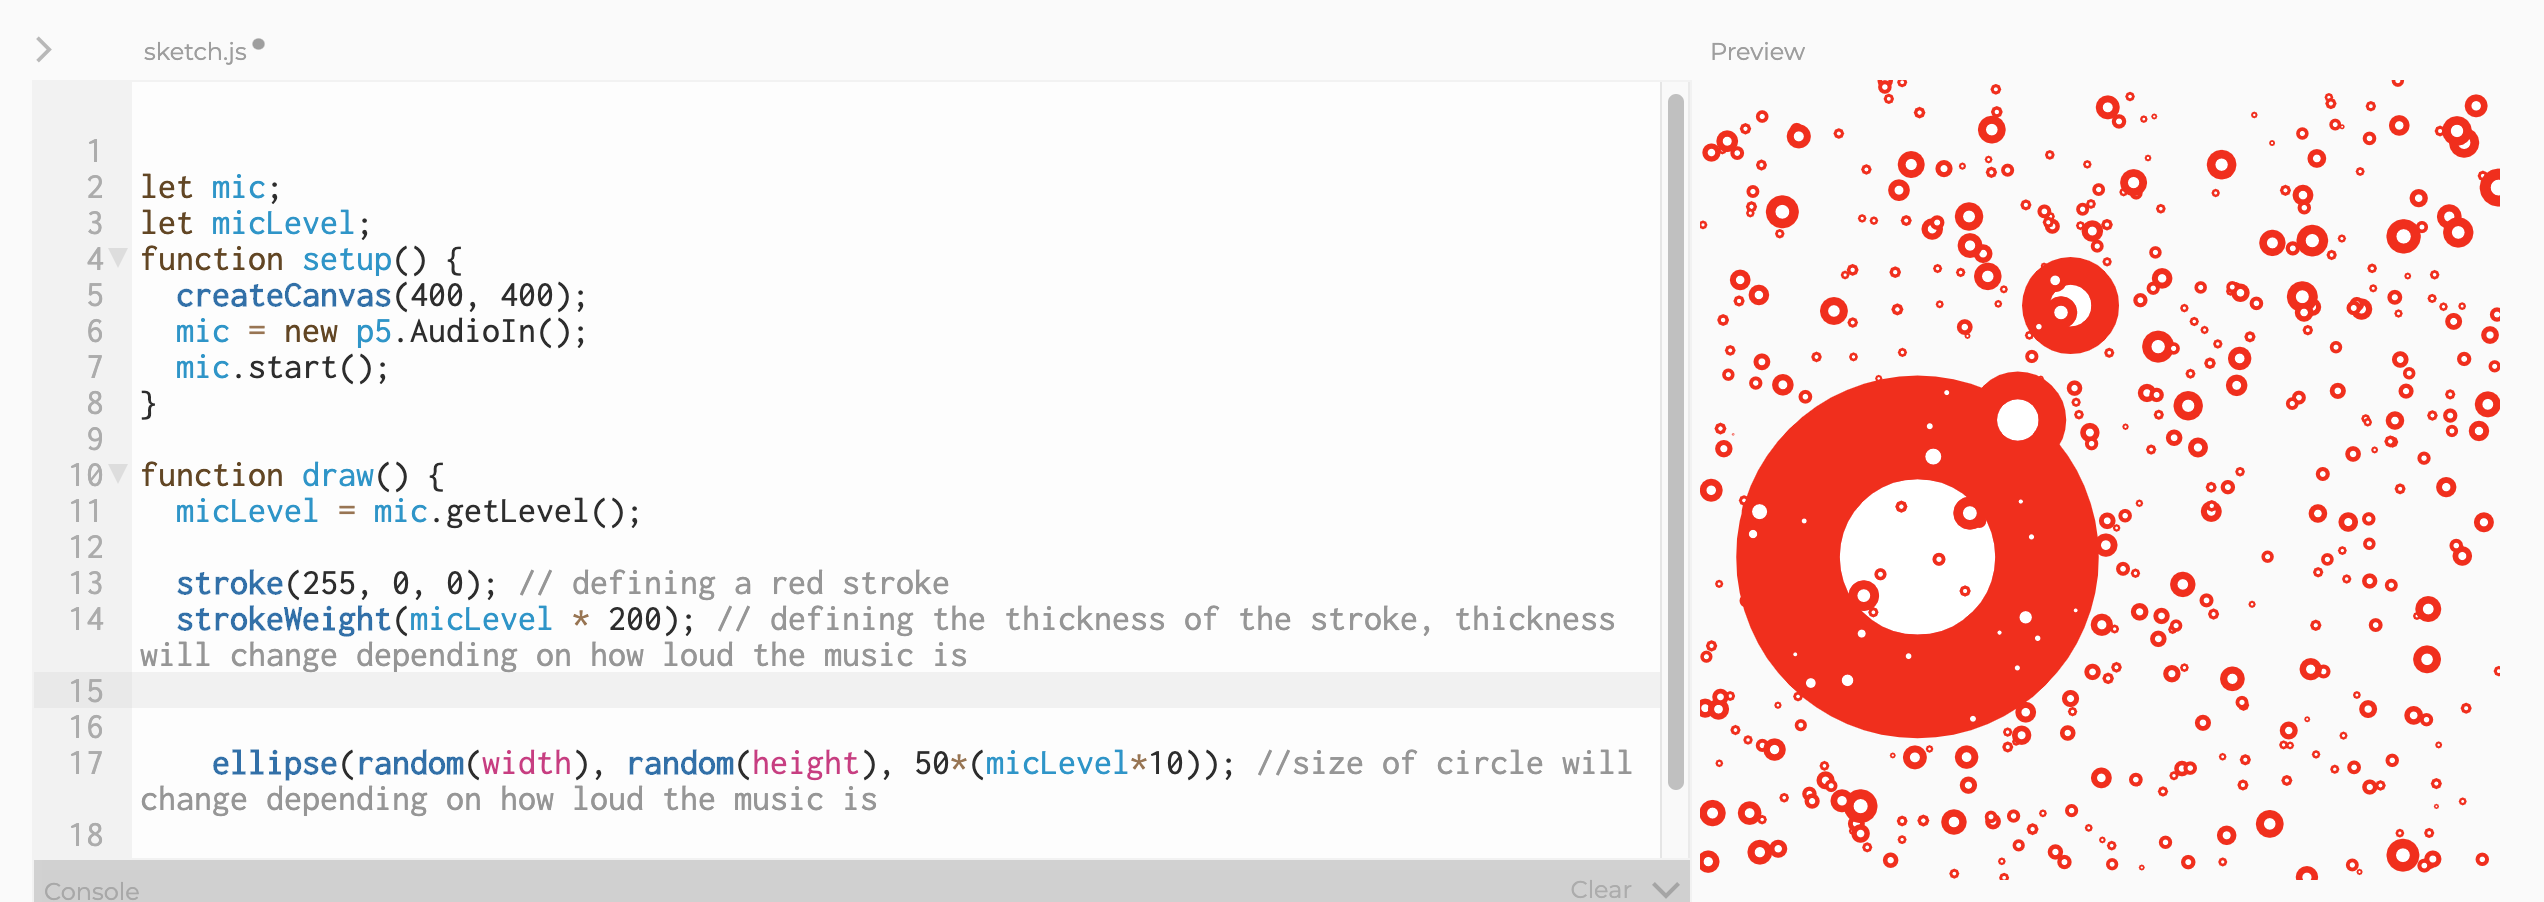
We’re getting really close now. Only a few more steps to go before the finish line. Now that you know your mic is working, you can try passing in the micLevel and playing some music to see how the visualization responds. You can also introduce a few more functions, such as stroke and strokeWidth. The role of stroke is to define the color of the border of your shapes. Like fill, you pass in 3 values for red, green, and blue. On the other hand, strokeWidth is for defining the thickness of the border. You can see an example below integrated with micLevel for some cool effects.

We’re at the final step. It’s going to involve a slightly more complicated programming concept, so bear with me. This concept is called loops, and in particular we are going to use a for loop. Basically you define a variable, like num, and that variable can increase or decrease until you reach a specified stopping point. Most of the time, for loops are used to count upwards by 1 to a designated end point. So a for loop like for(let num=1; num <= 8; num++) { console.log(num) } will output 12345678. Hopefully that makes sense. There is plenty of reading online about for loops if you are still confused.

Unfortunately it doesn’t look that cool in a screenshot. It will look much cooler for you when you actually have the code in P5.js yourself and play some jams! So first, let me put the code here so you can actually copy and paste instead of manually typing everything out. This was the exact code that was written in the original P5.js tutorial.

let mic;
let micLevel;
function setup() {
  createCanvas(400, 400);
  mic = new p5.AudioIn();
  mic.start();
}

function draw() {
  micLevel = mic.getLevel();
  background(5);
  
  stroke(255, round(micLevel * 800), round(micLevel*255));
  strokeWeight(micLevel * 200);

  
  for(let i =0; i < 6; i++) { // for loop counting from 0 to 6 
    fill(random(250), random(100), random(255), 255); //1 circle is drawn with every loop, so 6 circles total
    
    ellipse(i*60 + 40, micLevel*5000 + random(50), 50); //micLevel for the y value caues the circles to go up and down with the volume, i*60 means a new circle is drawn every 60 pixels along the x axis
  }
 
}

I also tweeted out a video of my own code and music so if you don’t feel like it or don’t have time right now to tinker with the code here is a short video. Make sure you turn the sound on!

https://twitter.com/nadyaprimak/status/1246484591004745728

Hope you enjoyed this P5.js tutorial. Stay tuned for another retrospective on SpacyCloud live workshop about the hydra-editor!

If you enjoyed this article, consider following me on Twitter @nadyaprimak or if you need more tips on breaking into the tech industry, you can read my book “Foot in the Door”.
What it Means to be a Creative Coder

Programmers rarely agree on whether or not coding is a creative profession. My interest in coding always stemmed from what I could create with the code. Seeing an interesting visual result from my efforts is usually the most satisfying part. Most programmers are less concerned with how their app looks and more concerned with the functionality. Usually, as long as the app works the way it is supposed to, most programmers are satisfied.

Of course that is an overly simplified model. Programmers often care about how the code is written, whether it is reusable and easy to understand for other programmers. One could argue that deciding on which tools to use and how to organize the different parts of the code involve creativity as well. Creativity is a broad term and I’m not here to make a commentary about whether or not programming is creative. This post is rather about people who identify with the term creative coder. Namely, folks who got into coding because they are interested in how they can express themselves creatively with technology.

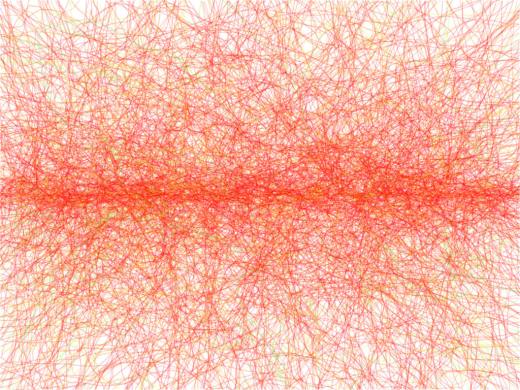
A beautiful procedural artwork made with Processing by Pierre Marzin. View the original and code here.

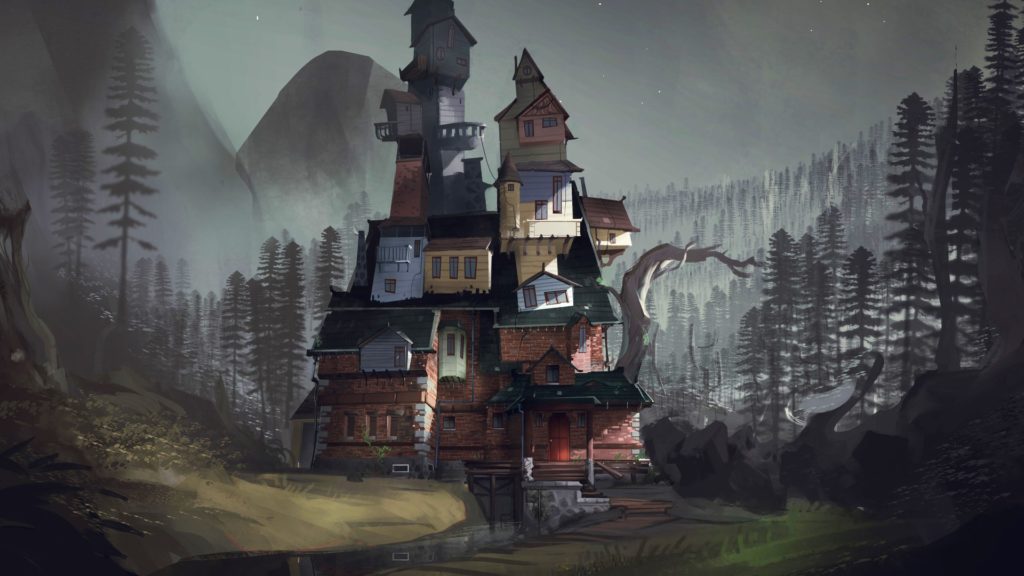
There are a lot of good examples of creative coders in some of my other blog posts, here and here. Nathalie Lawhead is one of my personal favorite creative coders. Their work lies at the intersection between games and interactive art. They draws a lot of their inspiration from old flash games and early net art. Games like What Remains of Edith Finch, which are sometimes called “walking simulators” by the gamer community for being primarily focused on storytelling can also fall into the category of creative coding.

Then there are folks who make all kind of interesting art with code on communities like Codepen. From unique loading screens to animated menus to scrolling backgrounds, these are also inherently creative. It’s hard to make a list of every kind creative coding out there because technology is constantly evolving. Tools like Processing and OpenFrameworks allow for especially dynamic and immersive art to be created, from moving and morphing fractals to particles replicating the flocking of birds or cell division, the sky is the limit for what kind of art creative coders can make.

I am a lot more passionate about programming when I am working on something like a game or interactive art project versus enterprise software. Tackling technical challenges can be fun occasionally but I am much more interested in the act of creation and the product I am creating. I am especially excited if the product I am making involves other creative aspects.

The house that you explore in the game What Remains of Edith Finch.

I think that is what differentiates creative coders from other types. What made them interested in coding was not the technical challenges or the logic puzzles but the excitement of creating something that is immersive and captivating. Creative coders may or may not be software engineers in their day job. Some are front end developers, fewer are back end developers. For me UI developer was especially attractive as a day job because it merges design and development. Even in these jobs, though, as I write about in another post, sometimes there is not as much creative expression as one might hope for.

That is the other thing that distinguishes creative coders. They always have that powerful longing for creative expression. Creative coders might also enjoy other things like drawing or music or writing. Personally I enjoy all of these things, and didn’t do any programming of my own for many years. Technically, I did tinker with web development in middle school but my first object-oriented programming code wasn’t written until college.

An astonishingly detailed artwork made purely with CSS by Ben Evans. View the original and code here.

Some creative coders have never even worked for a corporation in their lives. For instance, there are artists who started collaborating with technologists years into their career and discovered a new passion they didn’t know existed. They might have learned to code in their 30’s and used it to create generative art or experimental experiences. Frameworks like Processing have made coding a lot more approachable even for artists and folks who have traditionally felt ostracized from the world of code.

Unfortunately, being a creative coder can put you in a weird limbo between the world of programmers and the world of artists. I felt this very acutely in my career, as someone who graduated with a Visual Arts degree and then began working as a software developer.

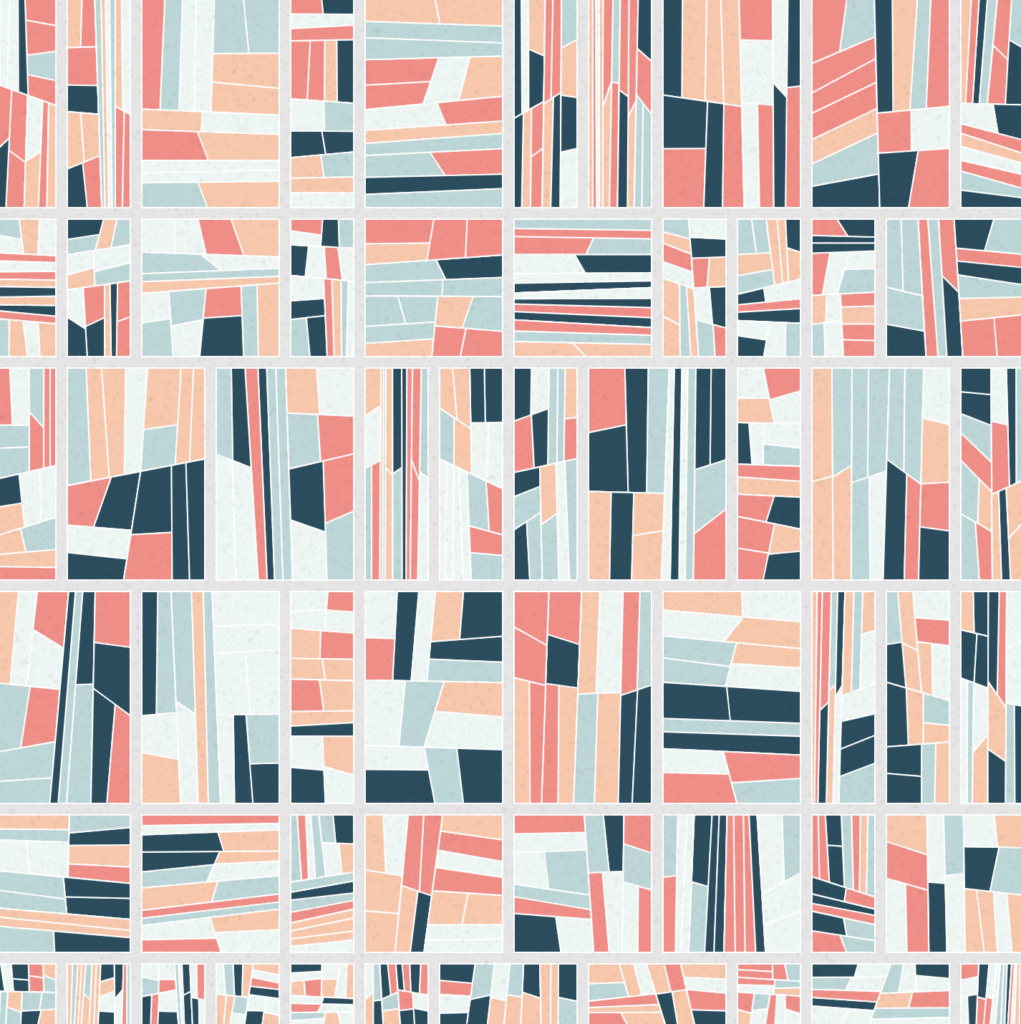
Abstract art made with Processing by Takawo. See the original and code here.

On the programming side, there is still a lot of gatekeeping, especially at the corporate level that makes creative coders feel unwelcome and unwanted. Programming interviews are often designed to test your knowledge of algorithms that are typically taught in computer science classes. Unfortunately, since creative coders often come from non traditional backgrounds the chances that they are familiar with these algorithms is pretty small.

There are also negative stereotypes among some programmers about creative folks specifically that will put them at a disadvantage as well. Some programmers out there believe that you are either a logical person or a creative person, basically concluding if you are good at art you cannot write code and vice versa. Obviously, this is ridiculous, but those who believe it can be hard to persuade.

Particle generation made with Open Frameworks by Julian Vidal.

Sadly, these gatekeepers sometimes succeed in convincing people and so some of them never even try to experiment with coding. These same gatekeepers are usually also the kind that make it harder for folks minorities in tech to have their accomplishments recognized. Usually this means if you’re a minority and identify as a creative coder, the path to recognition and respect can be even steeper.

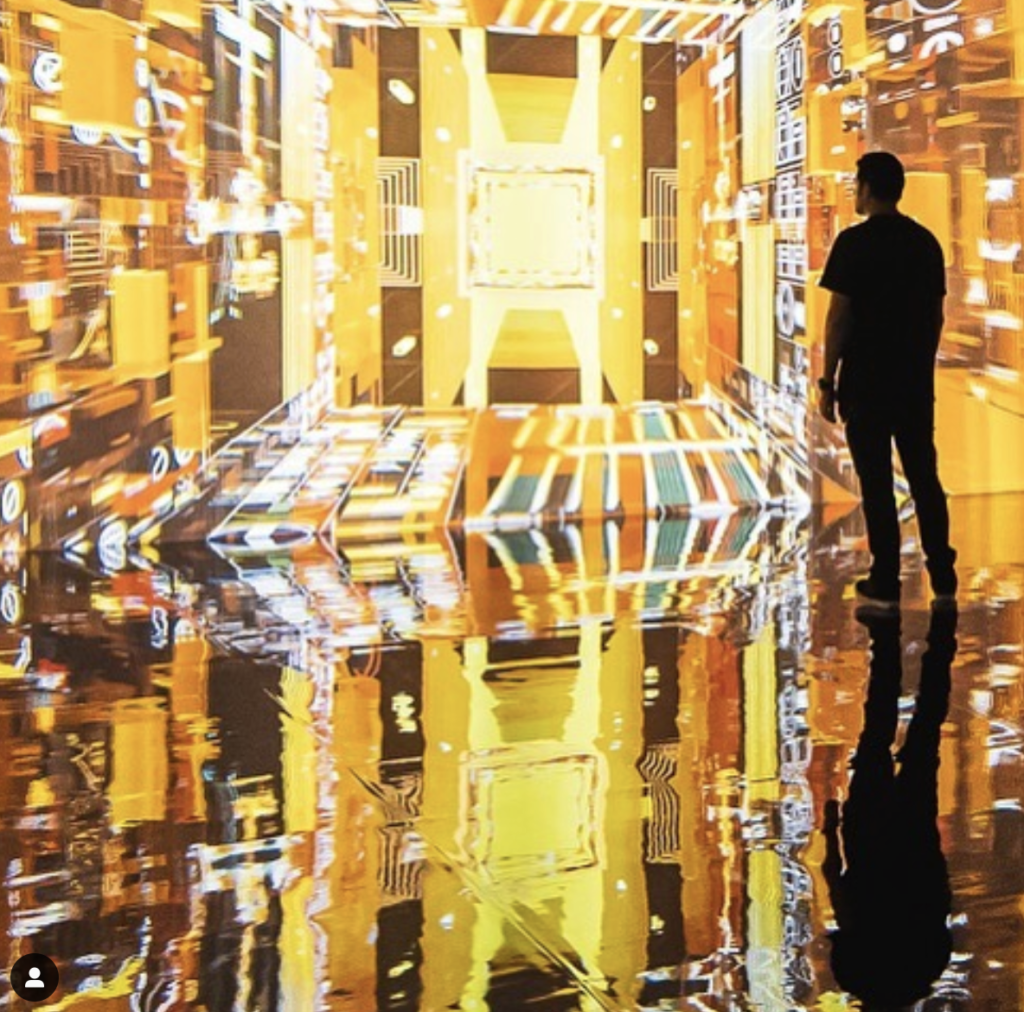
As if it wasn’t bad enough that gatekeepers in the programming world tend to look down on creative coders, there is a similar issue for these coders being recognized by the art community. First of all, the percentage of galleries that showcase generative art, immersive experiences, or experimental games is still very low compared to the galleries that showcase works of painting or sculpture. The few galleries that do, like Artechouse, can be extremely particular about who they choose to showcase. To be chosen for exhibition is akin to winning the lottery, probably even more difficult than landing a programming job at Google or Facebook.

One of the Miami exhibits at Artechouse from their Instagram page.

If you identify as a creative coder, you might be feeling a bit depressed after reading all of this. The thing is that regardless of how much gatekeeping or frustration creative coders face, they make some of the coolest projects on the internet. Once you make that first hypnotic generative art piece or that game that you’ve had in your head since you were 10, you won’t feel the same afterward. Ultimately, if you are a creative coder you know it’s so much fun that you would be doing it regardless.

Cover image by Masaki Yamabe


If you enjoyed this article, consider following me on Twitter @nadyaprimak or if you need more tips on breaking into the tech industry, you can read my book “Foot in the Door”.

Creative Coding Resources | When Artists Write Code

This is a follow up to my article reviewing the exhibit at Artechouse DC.

If you’re interested in popular creative coding tools like Processing I suspect the artists behind the Artechouse DC exhibit used, you should absolutely check out some of the links below.

While I certainly can’t guarantee that learning Processing will ever get you selected to exhibit at Artechouse, you will come away with a better understanding of how some of these art exhibits are formed. There’s also tools like Arduino which I am sure were involved at some point.

https://processing.org/

The main Processing website. Lots of examples, documentation, and tutorials for getting started with Processing, even if you’re new to code. Processing uses a very simple language based on Python that is quite easy to learn. There are also examples that allow artists to experiment with to start creating generative art quite quickly.

https://www.openprocessing.org/

A community for Processing developers, where its super easy to share your work and create a portfolio. If you’re looking for inspiration or source code to experiment with to see what sort of changes happen, this is a good place to go.

http://learningprocessing.com/examples/

Tons of examples of Processing in action, with code snippets alongside the result. All the exercises and examples are accessible online for free, with the code displayed alongside. There are also comments in the examples explaining parts of the code. It’s easy enough to copy and paste it into your IDE and make changes if you want to experiment more.

https://openframeworks.cc/

Open Frameworks is a open sourced, C++ based toolkit for creative coding. As they say in the about section, “Our intended audience are folks using computers for creative, artistic expression, and who would like low level access to the data inside of media in order manipulate, analyze or explore.” Might be a little harder to get started if you don’t have any coding background, however.

https://www.sergioalbiac.com/

One of my personal favorite Processing artists, who also experiments with artificial intelligence and machine learning to create amazing images. Although he sometimes uses Processing experiments to inspire his paintings versus the other way around, I find looking at his work always inspires me.

https://www.arduino.cc/en/Main/Products

Arduino boards are often used in tandem with Processing, because they allow for users to actually interact with the art. They are like miniature computers that can be setup with whatever inputs and outputs your project needs.

Did you find any of the above links helpful? Did you think the cherry blossom exhibit was better? Are you already exhibiting in spaces like Artechouse, or hope to in the future? I’d love to hear from you about your own experiences with tools like Processing and Arduino, and what you think of where the world of creative expression with technology is going. Leave your comments below!